Collaboration in Visily is built around flexible sharing options. You can invite people directly to your Workspace or specific items, or share access via a link with customized permissions.
What can be shared in Visily
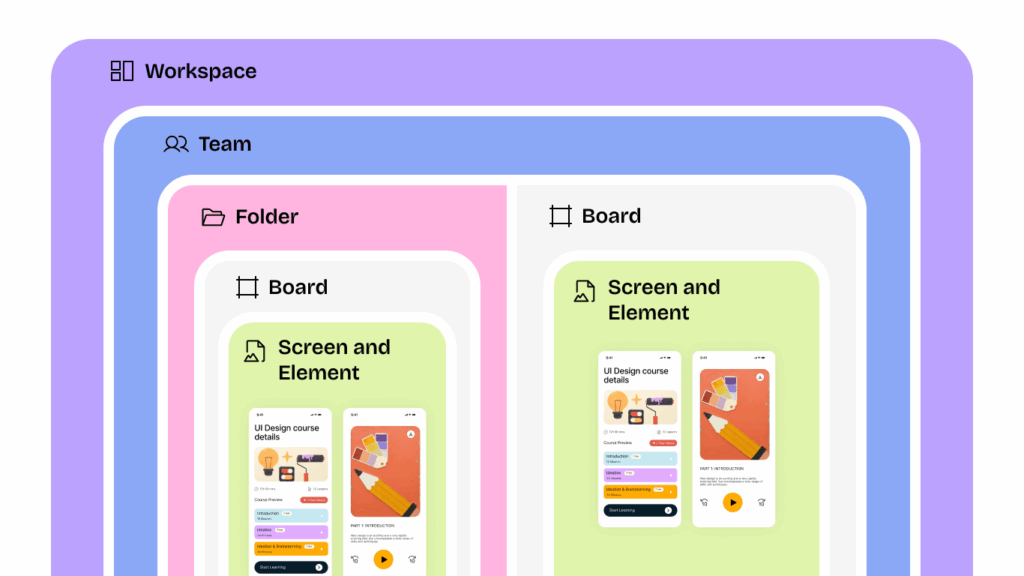
In Visily, you can share different levels of content depending on your needs:
- Workspace: Invite members to join and collaborate across all projects.
- Teams: Share access with smaller groups organized within the Workspace.
- Folders: Share collections of boards to organize related designs.
- Boards: Share entire boards for collaboration on a specific design project.
- Screen and Element: Share individual screens, design elements, or components to quickly direct collaborators to the specific part of a board that needs attention.
Granting access at one level automatically provides access to all levels beneath it.
Private vs Public access
Visily also supports both private and public access:
- Private access: Only people explicitly invited by email can access. Permissions (view or edit) are set individually.
- Public access: Anyone with the link can view or edit, depending on the link settings. This is useful for quickly sharing designs without requiring invitations.
Invite members to Workspace and Teams
At the Workspace and Team levels, you can only invite users as members (not as guests). To do so, use the Invite dialog from one of the following locations:
- Invite to Workspace:
- From the Workspace dropdown, select Invite Members.
- In Workspace settings, go to Members & Guests and click Invite Member.
- In the main view of the Workspace, click the Invite Member button in the top-right corner.
- Invite to Team in Business Plan:
- In the main view of a Team space, click the Invite Member button in the top-right corner.
- Next to the Team name, select More actions → View team members to open the Team settings dialog, then click Invite Members.

Invite via email
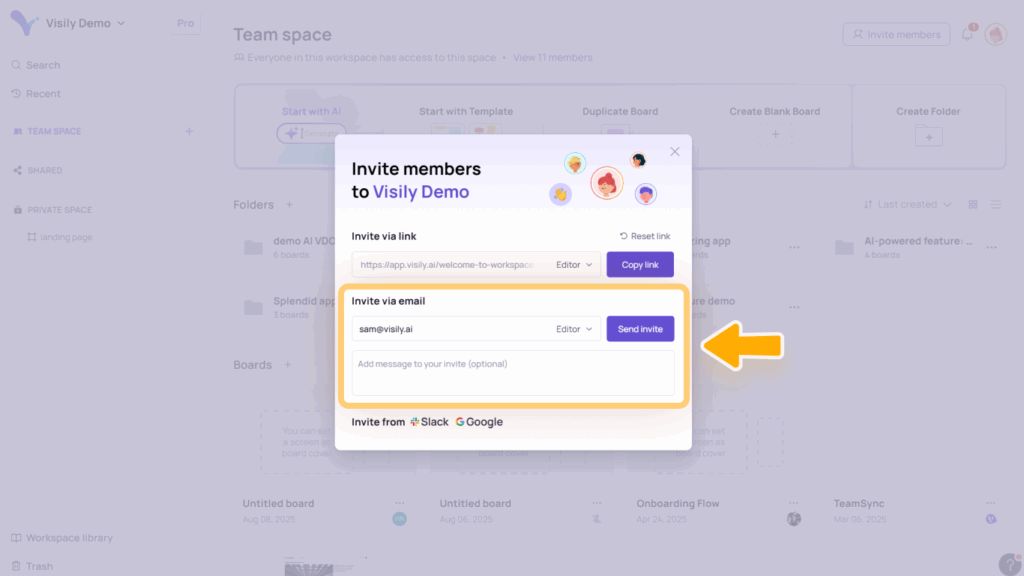
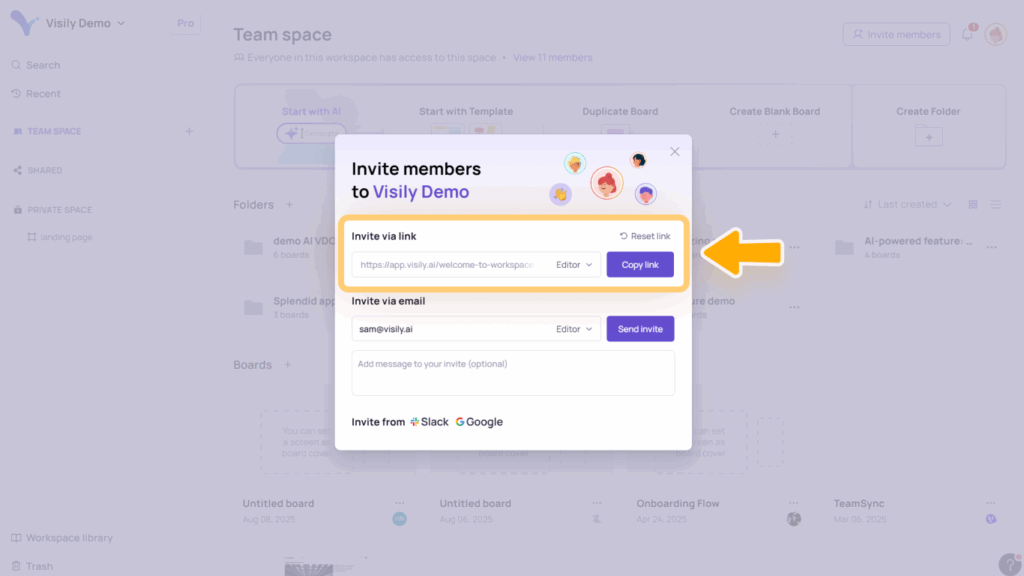
In the Invite member dialog, enter the email addresses of the people you’d like to invite to your Workspace or Team into the Invite via Email box. From here, you can modify your invitation with options of:
- Select the member’s permission
- Workspace: Admin, Editor, or Viewer
- Team: Editor or Viewer
- Add an optional note to include context for your invite
- Send the invitation: recipients will receive an email with a button to accept and join your Workspace or Team
You can monitor invitation status in the Members & Guests section of Workspace settings. Any pending invitations will display a Pending tag next to the email until accepted.
Invite via link
From the Invite Member dialog, you can also quickly invite people to join your Workspace or Team using an invitation link.
- Toggle Invite via link: This option is turned on by default. If you don’t want the invitation link to be active, simply toggle it off.
- Copy link: When the toggle is on, a link is generated. Click Copy link to share it.
- Set permission: Choose whether people joining via the link will be added as Viewers or Editors. (The Admin role can only be assigned through email invitations.)
- Reset link: Click Reset link to generate a new invitation link if needed.
Invite from Slack
Visily allows you to quickly invite your Slack contacts to your workspace or teams:
- In the Invite member dialog, click the Slack option in the “Invite from Slack, Google” section.
- You’ll be redirected to a Slack page to grant permissions. Click Allow to integrate Visily with your Slack workspace.
- After granting permission, you’ll be redirected back to Visily, where you can view and add your Slack contacts directly.
- Recipients will receive an email with a button to accept and join your Workspace or Team.
Invite from Google
Similar to Invite from Slack, Visily also allows you to invite your Google contact to your workspace or teams.
- In the Invite member dialog, click the Google option in the “Invite from Slack, Google” section.
- You’ll be redirected to a Google page to grant permissions. Click Allow to connect Visily with your Google account.
- After granting permission, you’ll be redirected back to Visily, where you can view and add your Google contacts directly.
- Recipients will receive an email with a button to accept and join your Workspace or Team.
Share Folders, Boards, Screen and Element
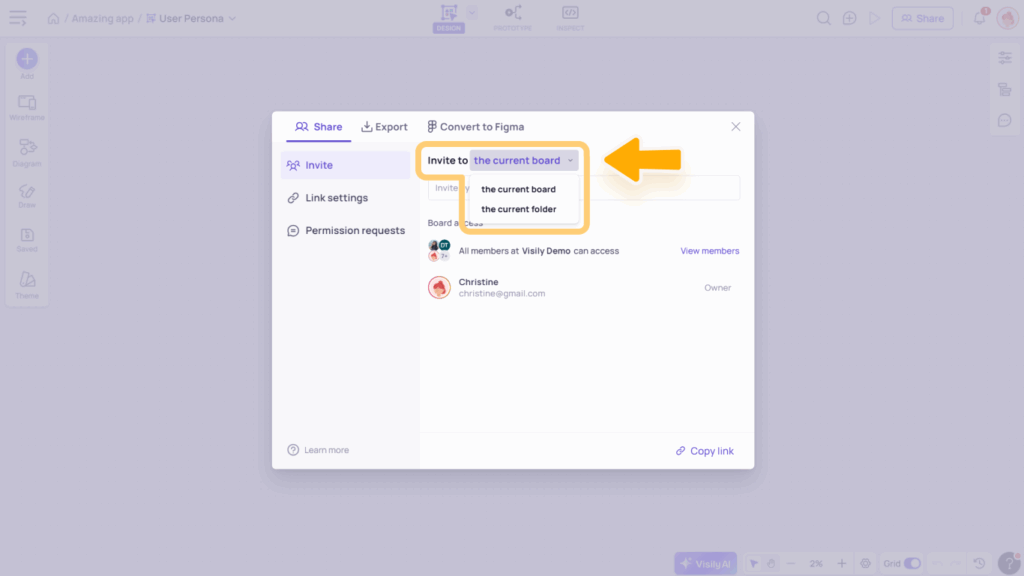
You can share Folder, Board, Screen, and Element with others by opening the Share dialog or using the available share options from these locations:
- Folder: Open the folder and click the Share button in the top-right corner, or open the More actions menu of Folder and select Share folder.
- Board:
- Open the board and click the Share button in the top-right corner, or Share board option from the board dropdown menu
- Open the More actions menu of board and select Share board
- Screen and Element: Select the screen or element you want to share, then either use More actions from the toolbar or right-click and choose Copy link.
When you open the Share dialog, you can manage Invites, adjust Link settings, and review Permission requests.
Invite in Share dialog
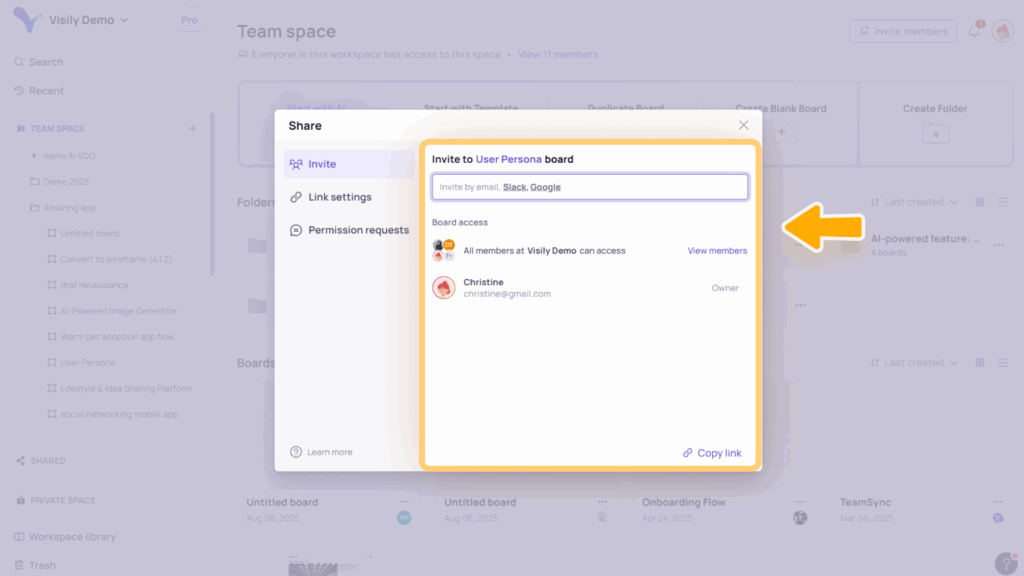
In the Invite section of the Share dialog, you can:
- Invite others to access your folder or board via email, Slack, or Google. The process is similar to inviting via email.
- View the access list to see who currently has access to the folder or board.
- Copy the share link for the folder or board. The link follows the permissions defined in the Link settings section.

Link settings in Share dialog
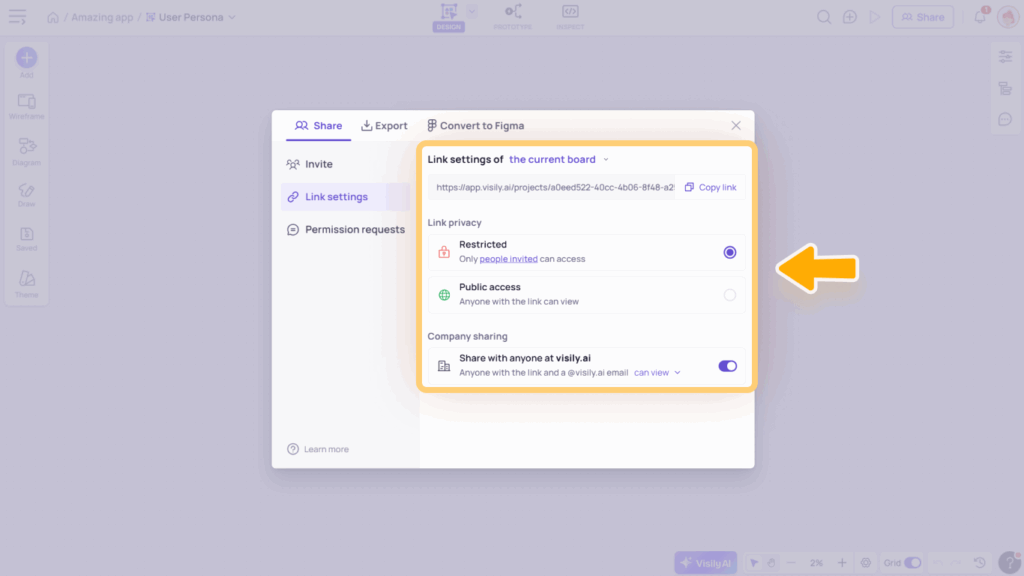
In the Link settings section of the Share dialog, you can:
- View and copy the generated link for a folder or board.
- Set link privacy to either Restricted (private) or Public access. By default, links are restricted.
- Adjust company sharing for a specific folder or board by allowing anyone with the link and a company domain to join with either View or Edit access.

Permission requests in Share dialog
The Permission requests section in the Share dialog displays a list of edit requests for a folder or for boards within that folder. If you have the appropriate role (owner of board/folder), you can choose to accept or deny these requests.
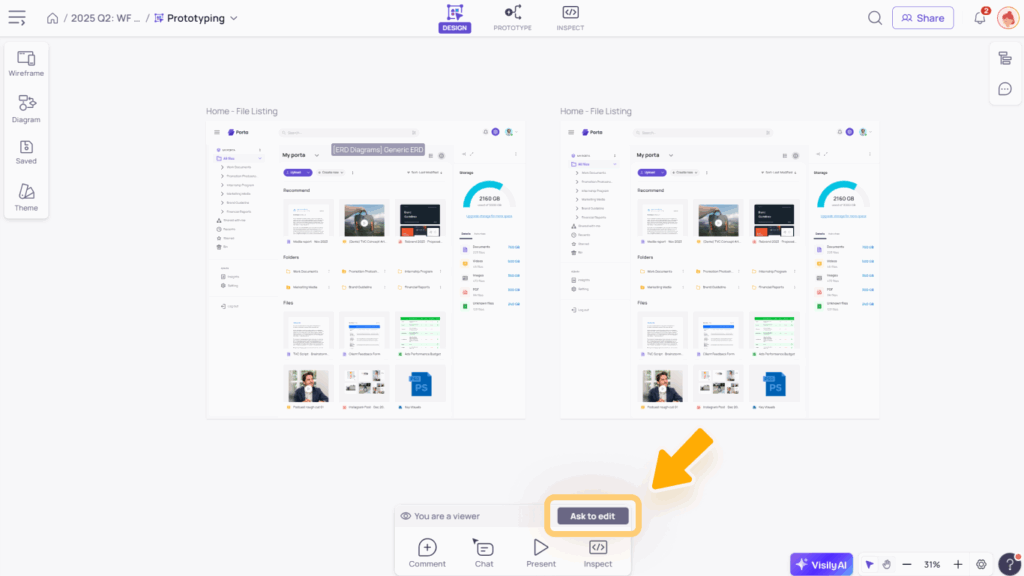
To request edit permission, a Viewer can click the Ask to edit button or select Request edit access wherever it appears, such as within a board or folder.
