Synced Templates help you maintain consistency across your designs effortlessly. By making changes to an original template, all instances of that template are automatically updated throughout the design. Whether you’re adjusting a navigation menu or tweaking a button style, Synced Templates simplify the process and save you valuable time.
Create a Synced Template
Steps to create
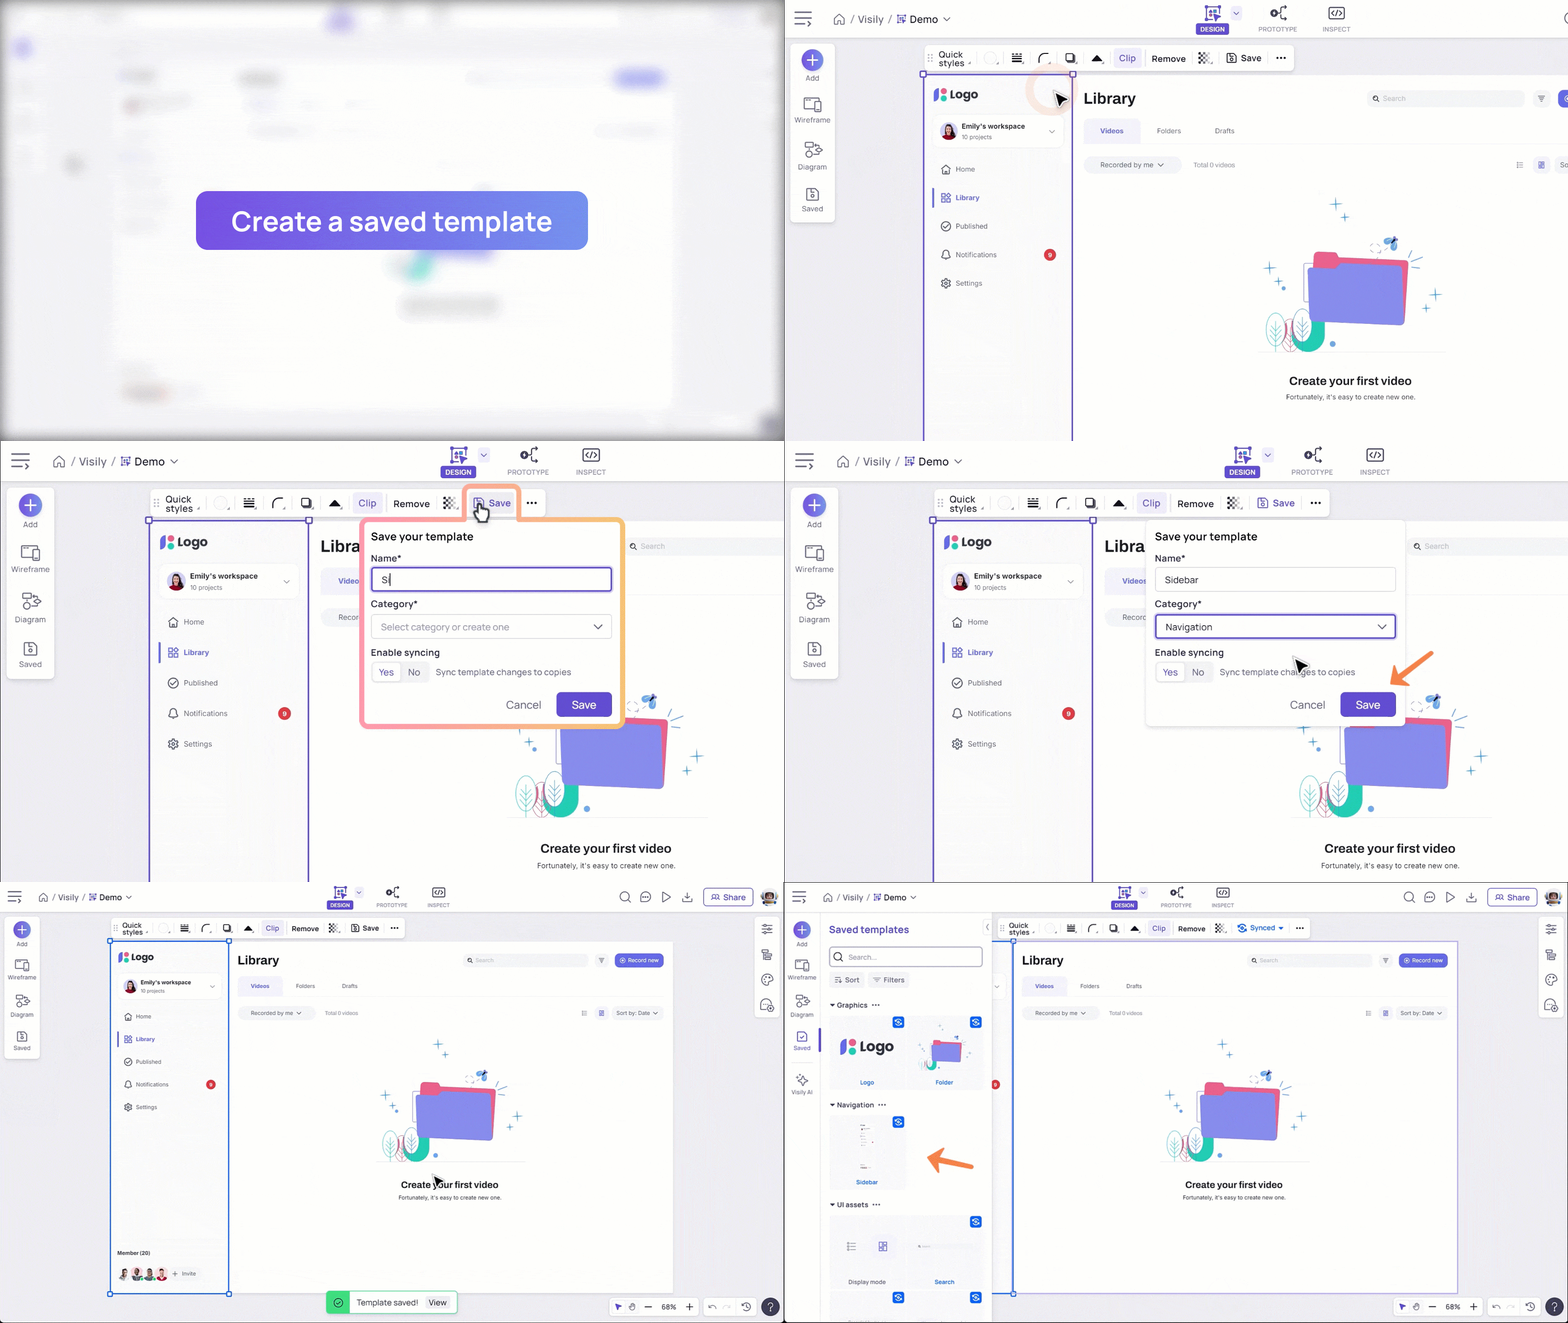
To create a Synced Template, start by selecting the elements you wish to save and clicking the “Save” button on the toolbar. A dropdown menu will appear where you can enter the template name and choose its category, then simply hit “Save”.
The toggle switch to enable syncing allows you to save elements as either a Synced Template—which enables synchronization of changes across all copies—or as a regular template that can be reused without this capability. To learn more about the different types of Saved Templates, click here.
All created Synced Templates are stored in Saved Library panel on the right.
What Can Be Saved as a Synced Template
You can save any individual element, container, or entire screen as a Synced Template.
However, there are some exceptions: diagram elements, grouped items, and multi-selections cannot currently be saved as Synced Templates.
Reuse a synced template
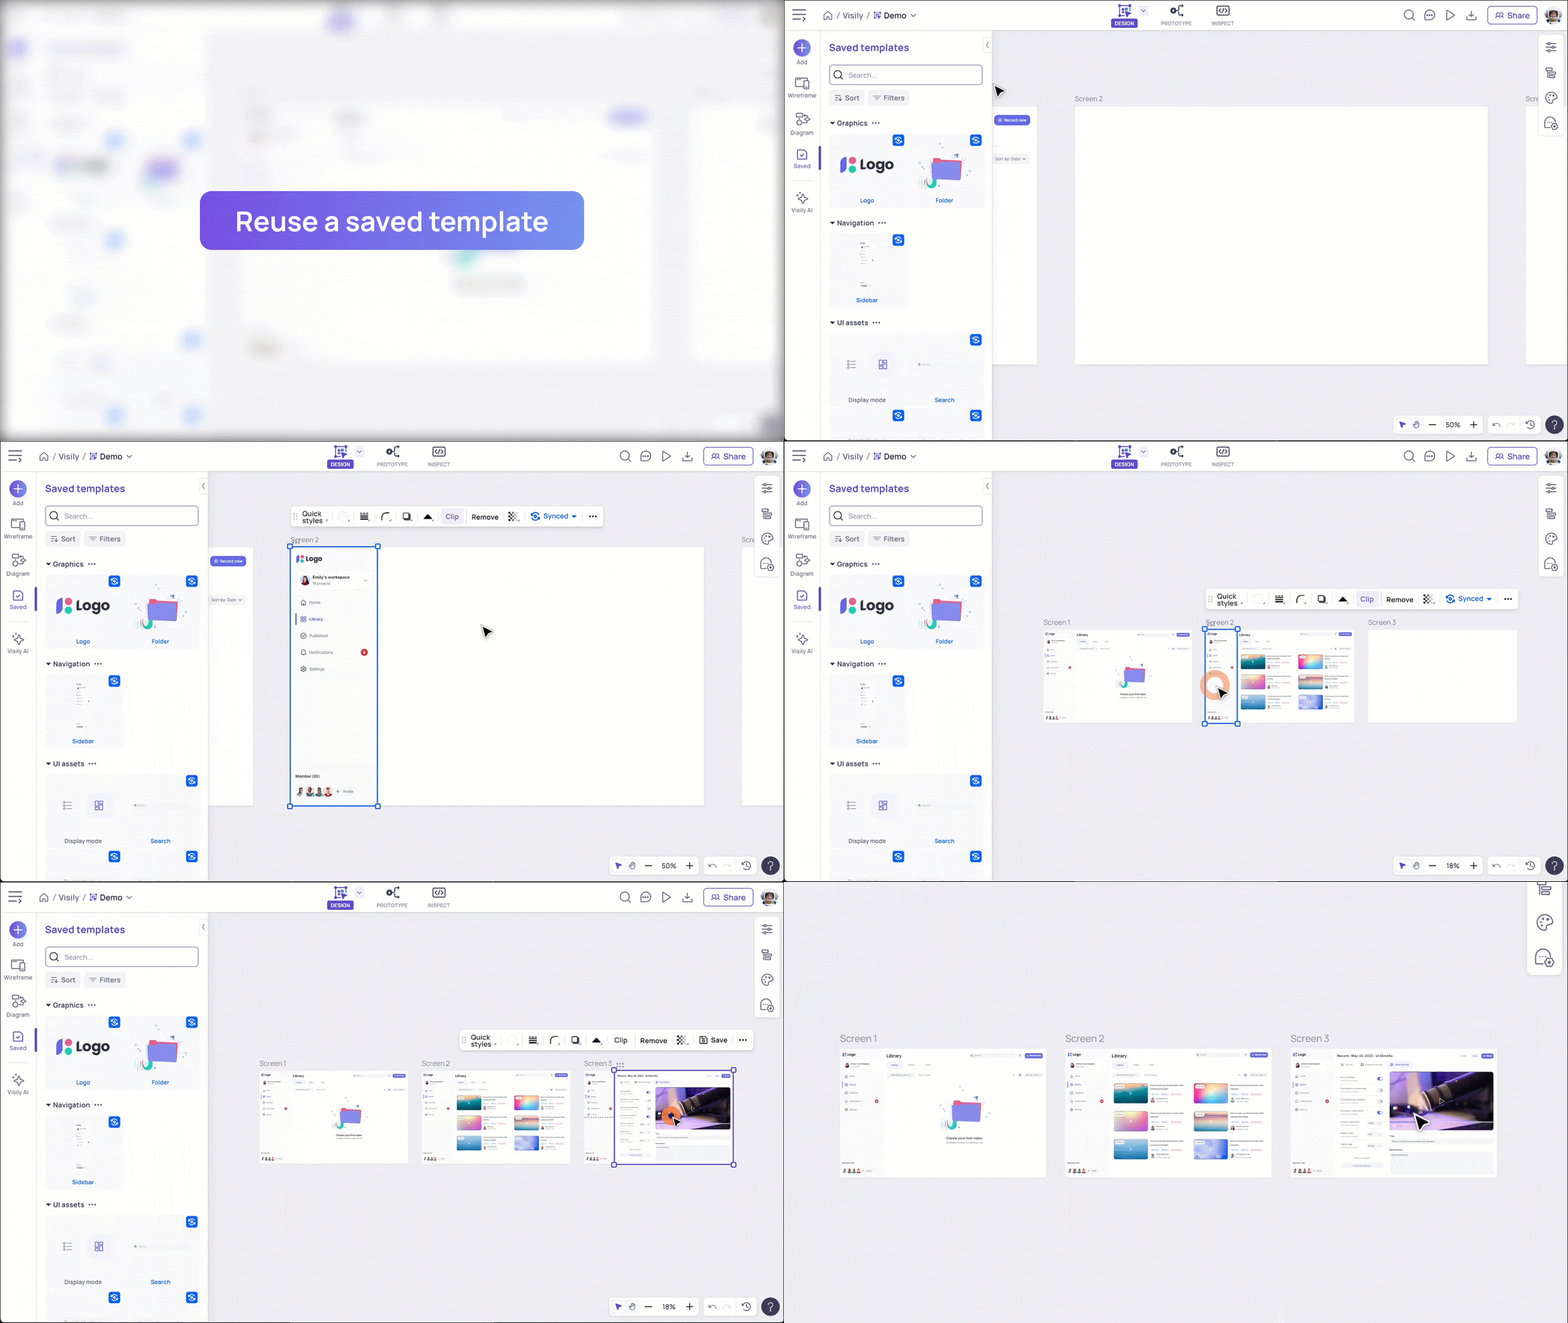
To reuse the Synced Templates you create, follow these methods:
- Add from Saved Library Panel: Drag and drop templates from the Saved Library on the left.
- Copy-Paste or Duplicate: Select a Synced Template on the canvas and use copy-paste or duplicate it to create new synced copies.
- Duplicate Parent Screen: If the Synced Template is part of a screen, duplicating the parent screen will include a synced copy of the template.
Edit origin template & sync changes
If you want to make a change to a template in such a way that it updates all its “copies” (or “instances”) on the canvas, you’ll need to edit the “origin” (or the master template). Once you save your changes, they will be automatically applied to every copy of the template.
Where to edit origin template
To edit the origin, you have several access points:
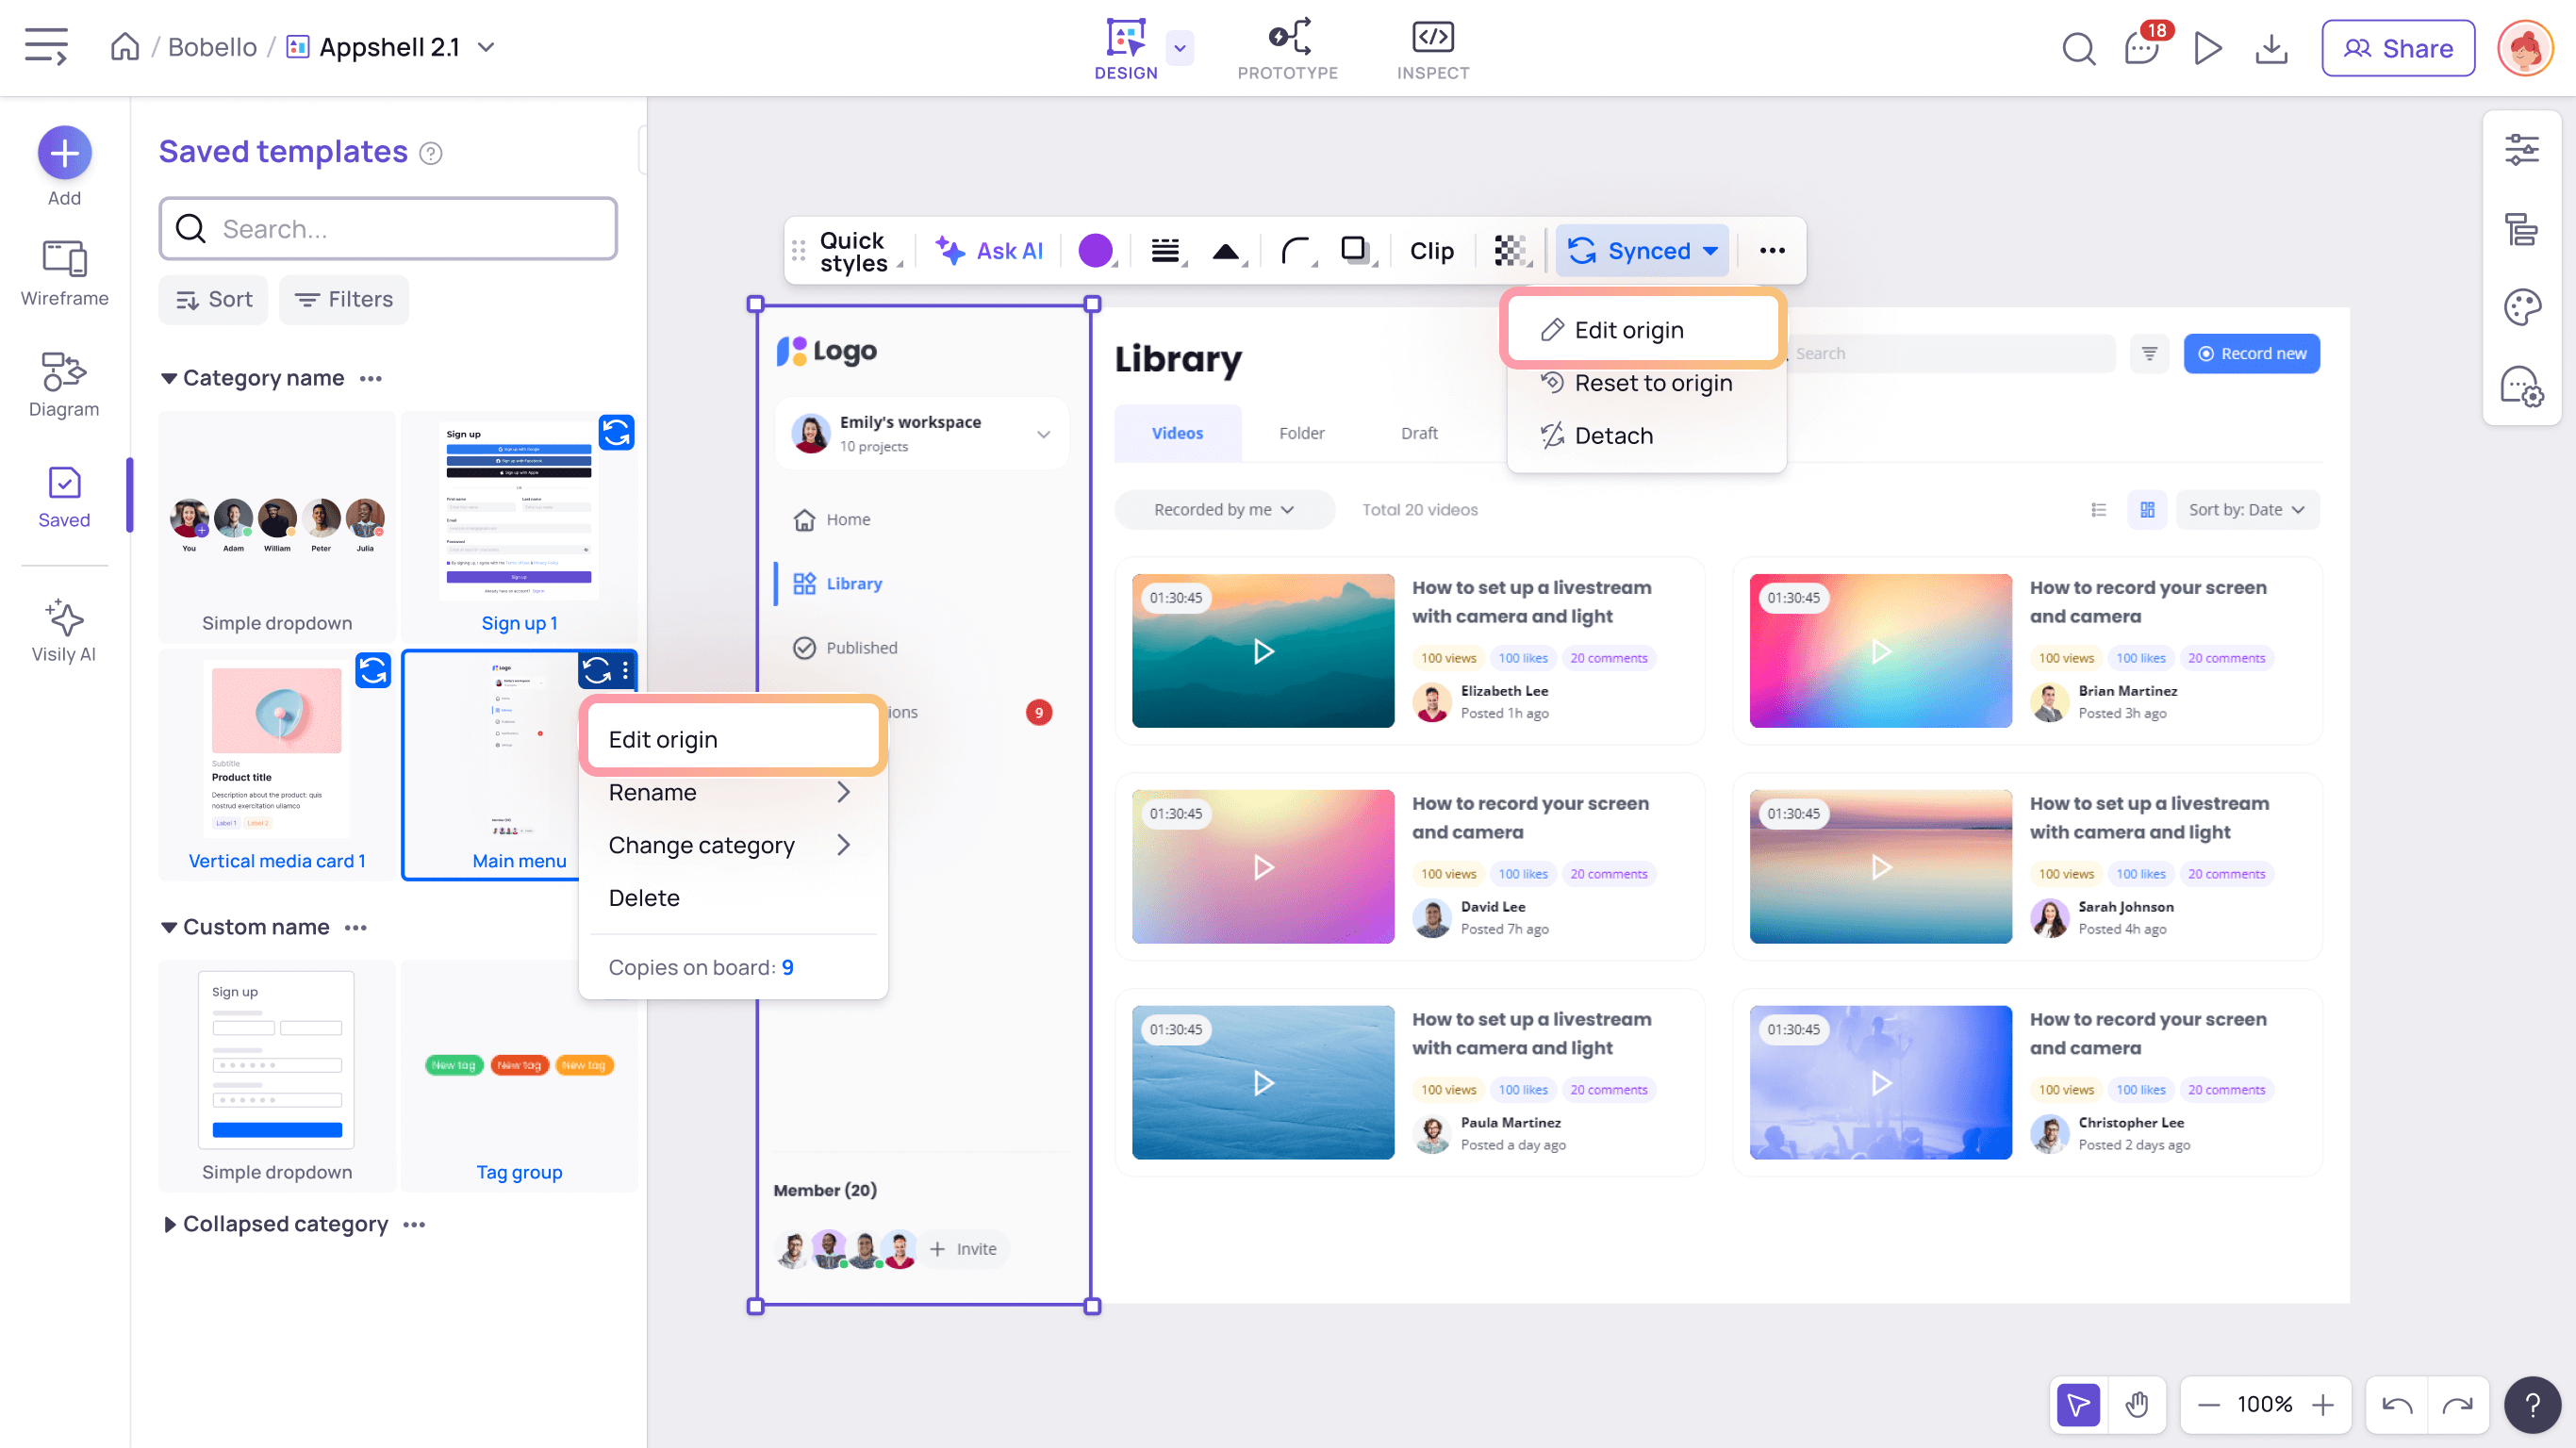
- Saved Library: Navigate to the Synced Template within the Saved Library, click the “More actions” icon button, and then select “Edit origin”.
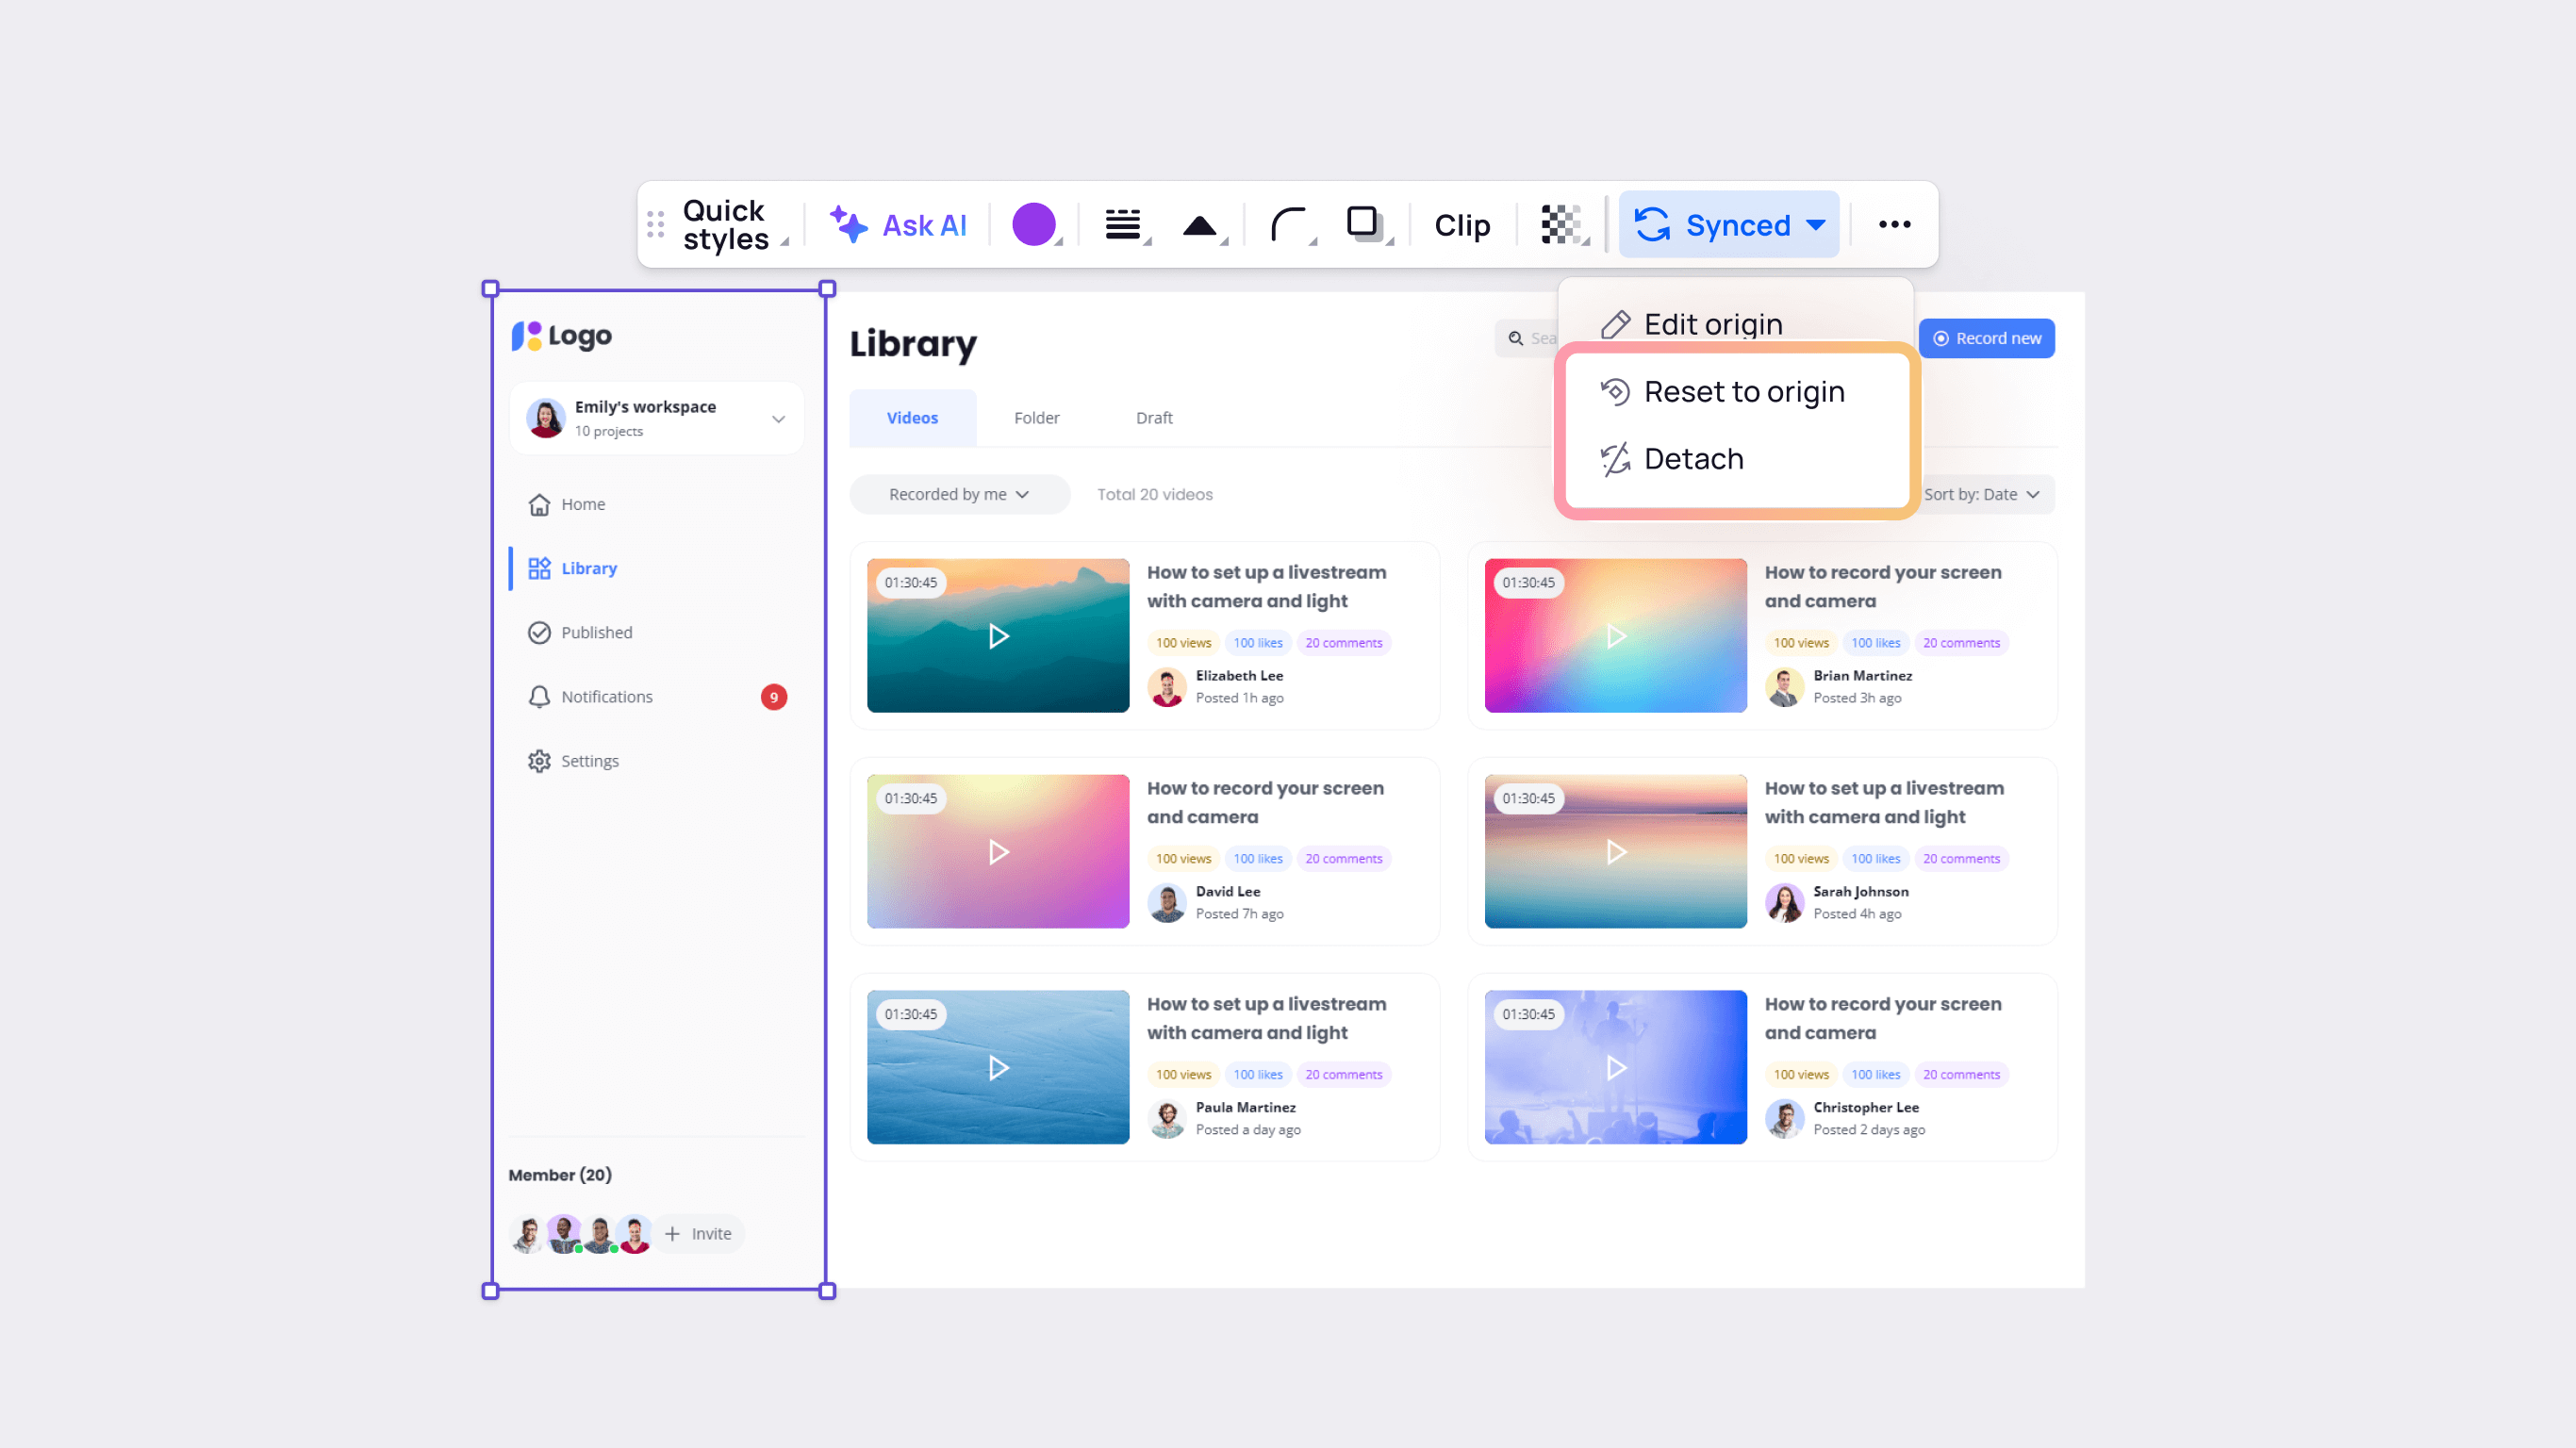
- On Canvas: Select any instance of the Synced Template on the canvas, click the “Synced” button on the toolbar, and then click “Edit origin”.
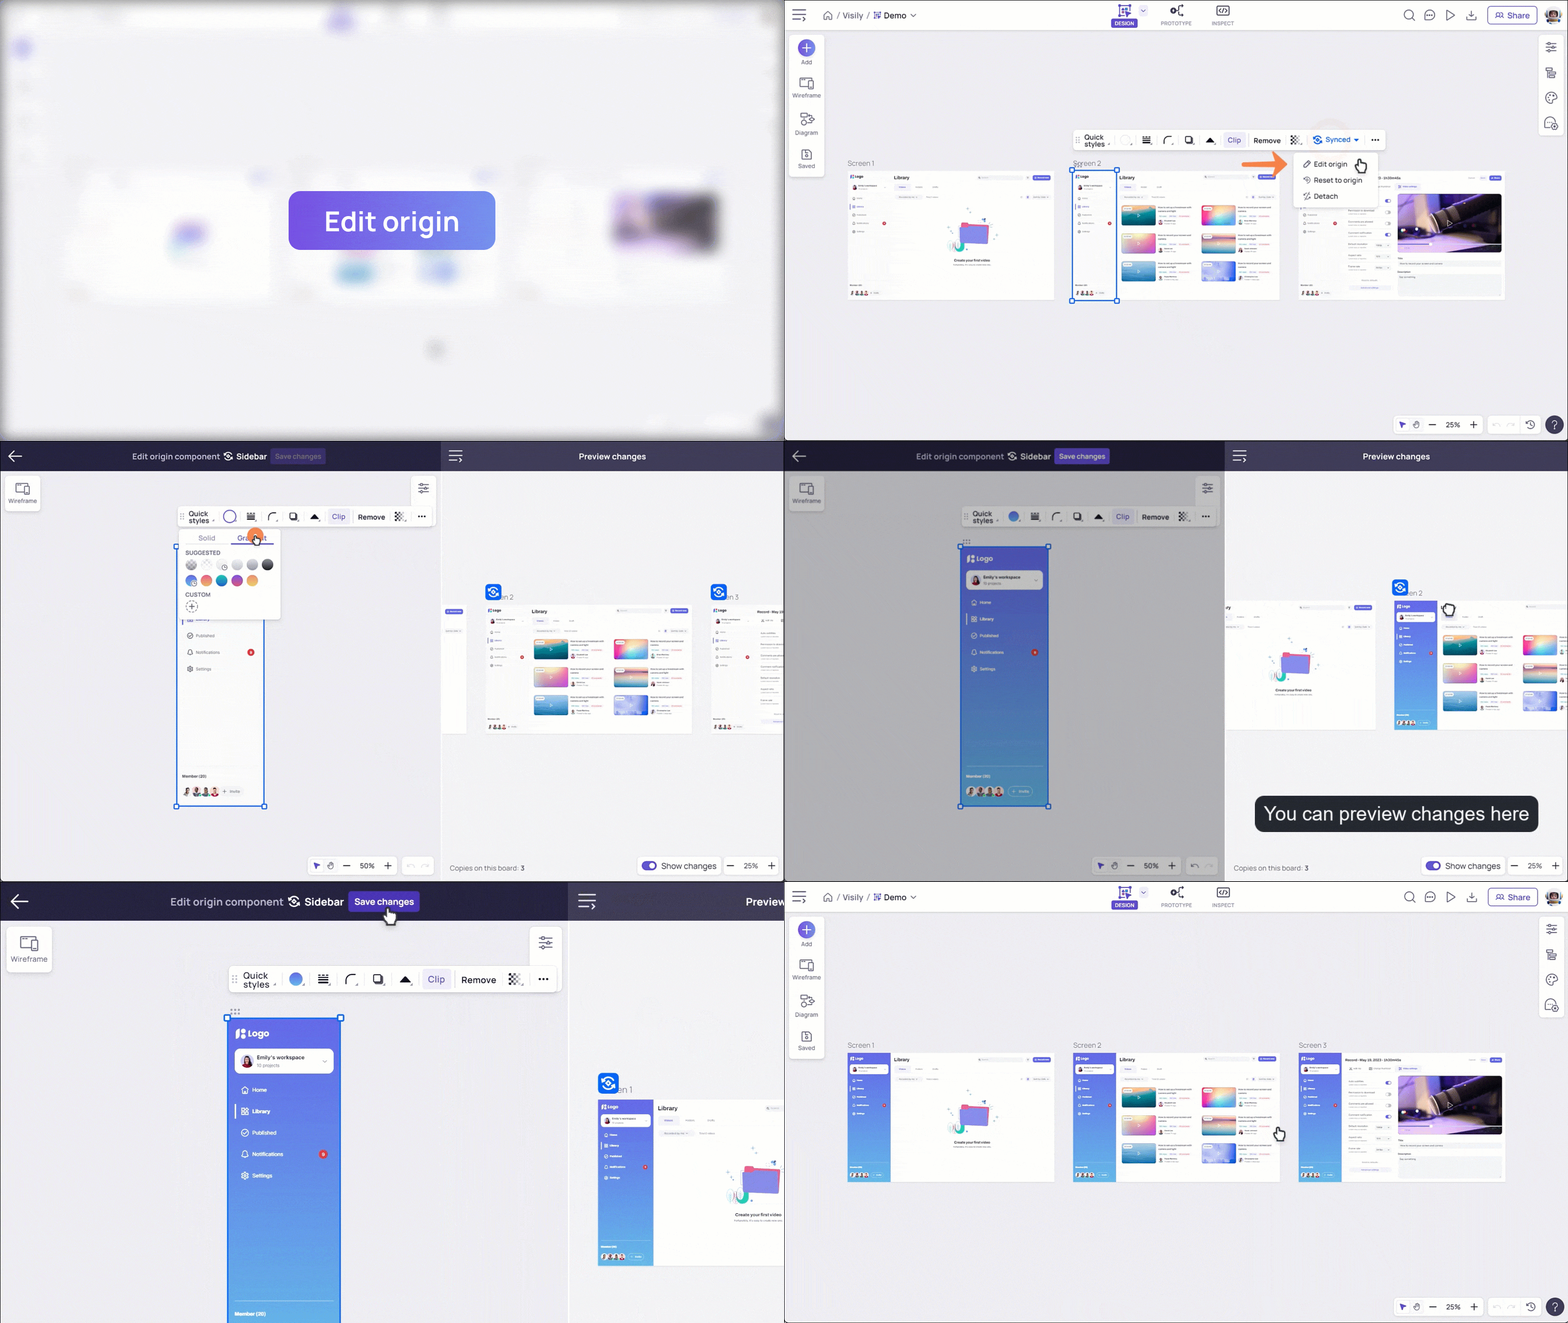
You will then be taken to an “Edit original” mode, where you can make changes to the origin. This mode allows you to preview how these changes will look across all instances before saving them.
Functions in the “Edit origin mode”
In Edit Origin mode, you have access to several functions:
- Edit the origin: On the left side of the screen, you can edit the origin template.
- Preview changes: On the right side, you can preview changes in real-time across all copies of that template on the board canvas to see how the changes apply in context.
- Save changes: When you’re done, click “Save changes” on the top bar to apply your updates
- Cancel changes: If you want to exit without saving your changes, click the Back [←] icon button on the top bar.
More about the Preview Changes area:
- You can expand or collapse this area as needed.
- To see a “before and after” comparison, use the “Show changes” toggle at the bottom of the preview area.
- If you don’t want to apply changes to a specific copy, simply click on that copy in the preview area and select “Detach.” This will remove the copy from being synced with the original template, so it won’t be affected by future changes to the original.
Edit copies of Synced Template
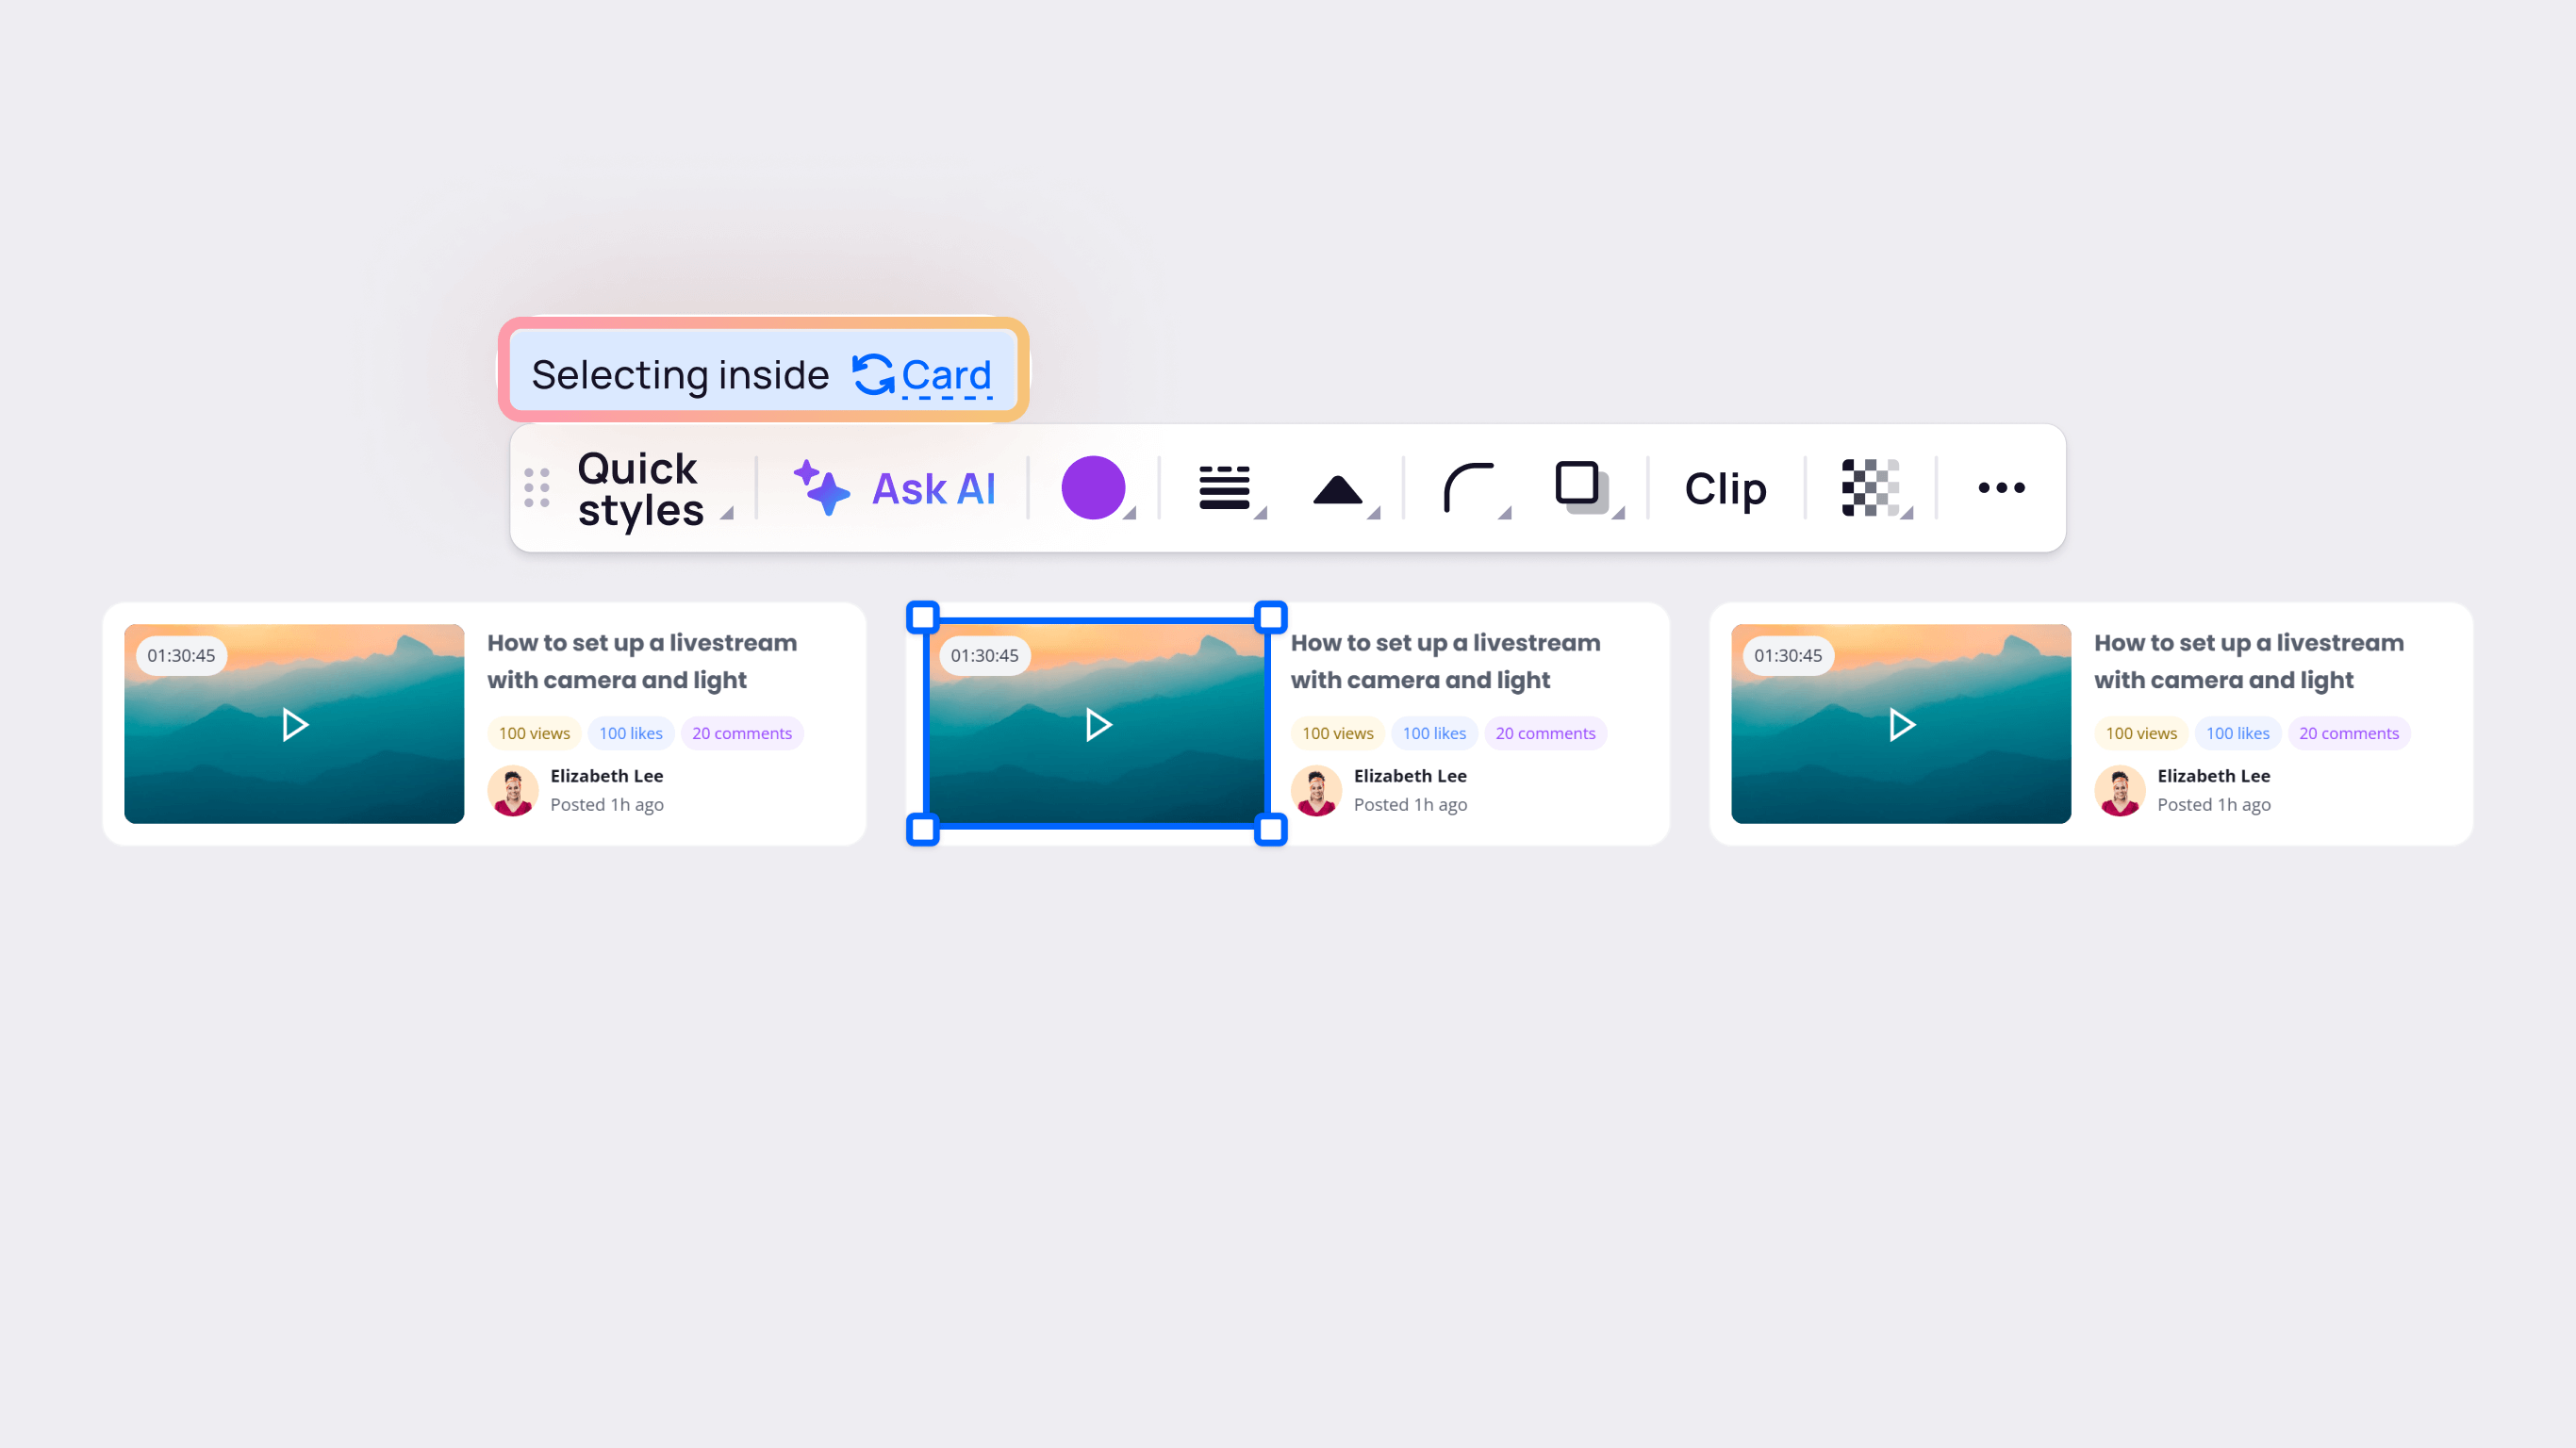
A “copy” refers to any instance or duplicate of a Synced Template that appears on the canvas. These copies allow you to replicate elements while maintaining a link to the origin template.
Make changes to a copy
You can freely edit a copy, and any changes you make will only apply to that specific copy without affecting other copies.
Once you’ve modified a copy, it becomes independent of future changes made to the origin. For example, if you alter the text of a button in one copy and then later update the same text in the original template, the update will propagate to all other copies except for the one you modified.
Detach and reset to origin
When selecting a copy, you have two additional options:
- Detach: This action will disconnect the copy from the Synced Template, turning it into an independent, normal element.
- Reset to Origin: This option allows you to revert any changes made to the copy, restoring it to match the current state of the original template exactly.
